
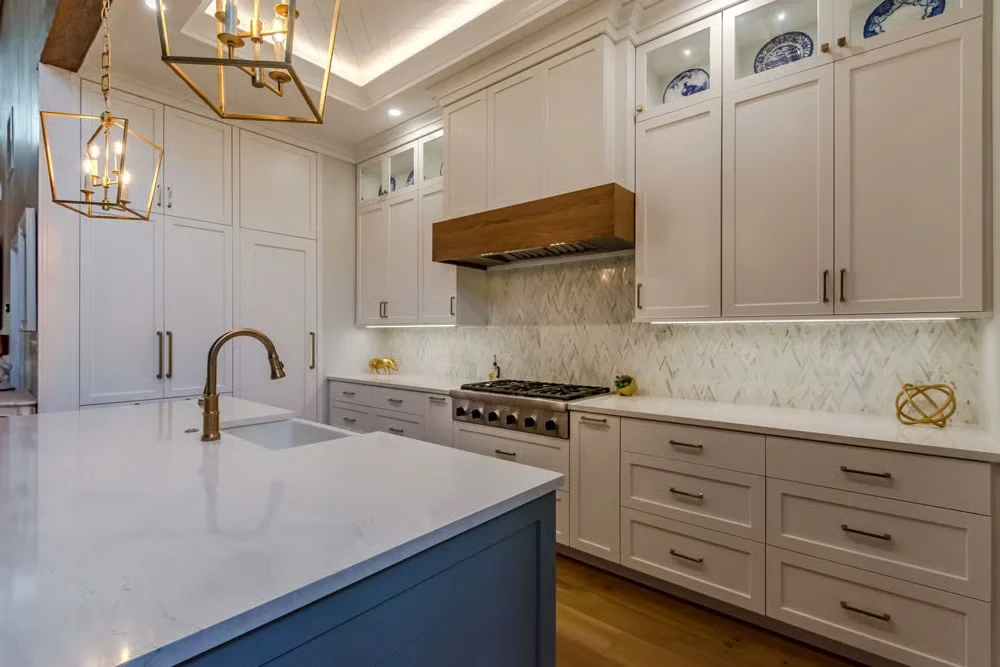
Tired of your kitchen but not ready for a full remodel? Painting your cabinets is the answer. Painting your cabinets gives old kitchen cabinets a fresh look for a fraction of the cost of replacement, and it can completely change the feel of the whole kitchen.
But here is the catch: cabinets are not like walls. They get touched, wiped, and bumped every day, so a sloppy job shows fast. The good news is that a great result is very doable with the right approach. This guide breaks down how to paint kitchen cabinets the right way, the best paint to use, the mistakes to avoid, and when to call in a pro.
Step 1: Prep Properly (This Is Where Jobs Are Won)
If you remember one thing, remember this: prep is everything. Most failed cabinet projects come down to skipped prep, not bad paint. Take the time to prep properly and you are halfway to a flawless result.
Here is the prep process the pros follow:
- Remove the doors and hardware. Take off all the cabinet doors, drawers, and hinges. Label each one so reassembly is easy. Modern hidden hinges should be bagged and tagged too.
- Clean every surface. Kitchen grease is the enemy of adhesion. Degrease the cabinet boxes, doors, and drawer fronts, then wipe them down.
- Sand for grip. A light pass with a sanding block dulls the old finish so paint can stick. Hit the flat surfaces and the detailed areas alike.
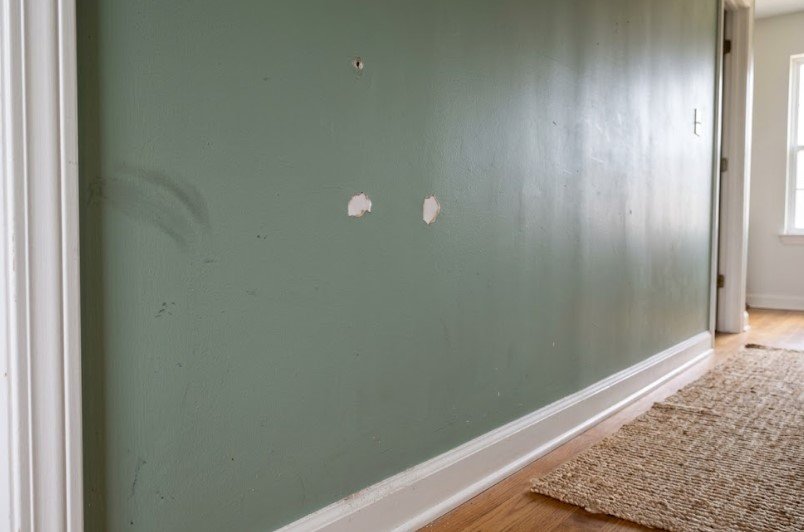
- Fill and smooth. Patch dings and old hardware holes, then sand smooth.
- Prime. A high quality primer locks everything down. This step blocks stains and helps your color go on even.
Gather all the supplies before you start: primer, paint, brushes, a sanding block, and drop cloths. Nothing slows a project like a mid-job supply run.
One safety note before you sand older cabinets: the U.S. EPA warns that any renovation, repair, or painting project in a pre-1978 home “can easily create dangerous lead dust,” and recommends hiring a lead-safe certified contractor for those homes. The federal ban on lead-based paint didn’t take effect until 1978.
— Source: U.S. EPA, “Lead-Safe Renovations for DIYers”
Step 2: Choose the Best Paint for Kitchen Cabinets
Cabinet paint is not the same as wall paint. You need a kitchen cabinet paint built to cure hard and stand up to daily use. So what is the best paint for kitchen cabinets?
For most kitchens, a cabinet-grade enamel is the way to go. A few strong options:
- Benjamin Moore Advance. A self leveling, alkyd-based cabinet paint that lays down almost like an oil but with easy cleanup. This advance paint flows out to hide brush marks and grain, so even cabinets with heavy wood grain end up smooth. Benjamin Moore Advance is a favorite among pros for its factory smooth finish, and many shorten the name to BM Advance.
- Sherwin Williams cabinet enamels. Durable, washable, and built for a professional finish.
- Water based paints vs. oil based paint. Older oil based paint cures hard but yellows and smells. Modern water based paints have closed the gap, offering durability with easier cleanup and low odor.
Skip cheap wall paint. The right paint is what gives you a durable finish that survives years of cooking, cleaning, and kid fingerprints. The difference in paint products really does make all the difference, and a different paint built for cabinets will always beat a leftover can from the garage. Pick a paint color you will love for years, since cabinets are not something you want to redo often.
Cabinet enamel costs more than wall paint for a reason—it cures into a hard shell built to take daily fingerprints, grease, and scrubbing.
For sheen, a semi gloss finish is the classic cabinet choice. Semi gloss wipes clean and resists moisture, which is exactly what a kitchen needs. A satin works too if you want a softer look, but semi gloss is the safe bet.
Step 3: Apply for a Factory Smooth Finish
Now the fun part. Your goal is a smooth finish with no brush strokes. Plan the painting process before you start, and here is how to get there:
- Thin, even coats. Resist the urge to load the brush. Heavy coats are what cause drips and brush strokes.
- Use the right tool. A paint sprayer delivers the smoothest, most factory smooth result. A quality brush and foam roller can also work well with patience, especially with a self leveling paint.
- Two coats minimum. Apply your first coat, let the paint dry fully, then apply a second coat. A darker color may need a third. Each fresh coat builds toward full, even color.
- Respect dry time. Each coat needs time before the next. The paint dries quickly to the touch, but it needs longer between coats for a strong bond. Some bonding primers claim no sanding required, but a light scuff still gives the best grip.
- Add a top coat if needed. Some painters add a clear top coat for extra protection on high-use cabinets.
Two thin coats will always beat one thick one—patience between coats is the quiet secret behind every factory-smooth finish.
Patience between coats is the secret. Rushing is how you trap brush strokes and ruin an otherwise great paint job.
Common Cabinet Painting Mistakes to Avoid
Even good DIYers trip over the same issues. Watch out for these:
- Skipping the cleaning. Paint will not bond to grease. This is the number one cause of peeling.
- No primer. Without a primer, your color goes on uneven and chips fast.
- Rushing the coats. Painting over a coat that is not dry traps moisture and softens the finish.
- Heavy coats. Thick paint sags and shows every brush stroke.
- Reassembling too soon. Paint feels dry in an hour but needs days to harden. Rehang too early and you will dent the finish.
A small note on patience: even the best cabinet paint needs time for full curing. Most reach full hardness in two to three weeks, so treat your cabinets gently during that window. Old cabinets with lots of detail need extra care, since the flat parts dry faster than the grooves, and small touch ups are easier before everything fully hardens.
Keep the kitchen ventilated while paint cures. The U.S. EPA advises homeowners to “increase ventilation when using products that emit VOCs,” noting that during and just after activities like paint stripping, indoor levels can spike far above normal.
— Source: U.S. EPA, “Volatile Organic Compounds’ Impact on Indoor Air Quality”
DIY vs. Professional Cabinet Painting
Here is the honest truth. A careful DIYer can paint cabinets, and on a small kitchen it can save money. But there is a reason a pro finish looks different.
Professional painters bring spray equipment, a dust-controlled space, and years of practice. That combination is a game changer for the final result. The finished product comes out factory smooth, with even color and no brush marks. A pro also works faster, so your kitchen is out of commission for less time.
There’s a health angle to that dust-controlled, well-ventilated setup, too. A recent peer-reviewed review of indoor-air VOCs notes that high concentrations have “frequently been observed in newly constructed or renovated residential buildings“—which is why low-odor, low-VOC cabinet enamels and proper airflow matter during a fresh paint job.
— Source: “Volatile Organic Compounds in Indoor Air: Sampling, Determination, Sources, Health Risk, and Regulatory Insights,” PMC / National Library of Medicine
DIY makes sense if you have the time, patience, and a steady hand. But if you want a truly professional finish on more cabinets or a whole kitchen, hiring an expert is often worth every penny. For homeowners who want professional painting services without the DIY hassle, the choice is easy.
A sprayer in a dust-controlled space is the one advantage a weekend DIY setup simply can’t replicate—and it’s exactly what “factory smooth” means.
Paint or Replace? When to Choose Cabinet Painting
Before you spend a dime, ask one question: are your cabinets in good shape? If the boxes are solid wood or quality plywood and the structure is sound, painting is the smart call. Painting existing cabinets costs a fraction of replacement and delivers a dramatic transformation.
Replacement only makes sense when the boxes are damaged, swollen, or falling apart. If the bones are good, repainting cabinets is the cost-effective path to a brand-new look. The same logic applies to bathroom cabinets too.
For Oklahoma City homeowners, painting is usually the clear winner: less money, less mess, and a fresh kitchen in days instead of weeks.
Get a Flawless Finish With Next Level Painting
Painting cabinets is rewarding, but it is detailed, dusty work that rewards experience. If you want a flawless, lasting result without the hassle, our team is here to help.
“After 2,500-plus projects across the OKC metro, we’ve learned the finish is only as good as the prep behind it. That’s why we spray in a controlled space, use premium coatings, and back every cabinet job with a 3-year warranty—so your kitchen still looks factory-fresh years from now.”
— The team at Next Level Painting
Next Level Painting has completed over 2,500 projects across the OKC metro since 2014. Our skilled crew uses premium paints, sprays for a factory smooth finish, and backs every project with a 3-year warranty. From a single bathroom vanity to your entire kitchen, we deliver the best finish with precision and care.
Ready to transform your space? Call Next Level Painting at 405-920-3934 or request a free estimate today. Let’s give your Oklahoma City kitchen a fresh new look that lasts.
Related reading: Still weighing your options? See our full guide on whether to paint or replace your kitchen cabinets.